Amazon Route 53: Concepts and ConfigurationsAmazon Route 53: Concepts and Configurations
In this excerpt from "Practical AWS Networking," learn about Amazon's DNS service.
February 12, 2018

In this chapter, we will focus on Amazon Route 53 for domain names, routing traffic to resources for a domain. Amazon Route 53 is a domain name or DNS Service. It is a reliable and scalable service that has DNS servers distributed globally. It scales automatically to manage spikes in DNS queries, and so is robust.
The pricing model is pay-as-you-go. We can purchase a domain name from Route 53, or we can transfer it from an existing provider. We can also utilize Route 53 as a DNS service only.
We need to create a Hosted Zone, and then each Hosted Zone requires a record set that provides mapping to the IP address or CNAME with the domain name.
This chapter will cover the following topics:
Overview of Amazon Route 53 concepts
Configuring Amazon Route 53
Configuring Route 53 for a web application
Overview of Amazon Route 53 concepts
Amazon Route 53 provides a facility to register domain names, a Domain Name System (DNS) service so that domain names are translated into IP addresses, and does it also supplies health checks, by sending automated requests to the application so that its availability is reached:

(Click on image for larger view)
For your website to have a global reach and brand value, it should have a name. This is the domain name that users use to visit your website. Amazon Route 53 provides the facility to register domain names. There are situations where you must have purchased the domain name from other providers; in such cases, you can optionally transfer it to Amazon Route 53. Amazon Route 53 uses CloudWatch alarms to monitor the health of resources such as web servers and email servers.
Configuring Amazon Route 53
In this section, we will configure Route 53. We will demonstrate the process of domain registration.
To configure Amazon Route 53 follow these steps:
Go to Services | Networking & Content Delivery | Route 53.
Click on Get started now for Domain registration:
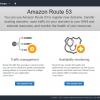
(Click on image for larger view)
Click on Register Domain:

(Click on image for larger view)
4. Enter the domain name that you want to register and then click on Check:

(Click on image for larger view)
Click on Add to Cart for a suitable and available domain name. Click on Continue.
Select the number of years in the Register for year field.
Provide contact details.
You can configure privacy protection also. This concerns whether you want to conceal your contact information from WHOIS queries. If you select Yes, your contact information will be masked. If you select No, your contact information will be publicly available.
Click on Continue.
Verify and purchase the domain name.
Configuring Route 53 for a web application
Before configuring Route 53 for the sample web application deployed in the Amazon Elastic Beanstalk, let's first understand what a public hosted zone is. A public hosted zone contains information about routing traffic for a domain and its subdomains. Basically, it responds to queries based on the resource record set created by a user. It is important to understand that once you create the public hosted zone, a name server (NS) record and a start of authority (SOA) record are automatically created. The NS record is important here. It provides you with four name servers that you need to configure with your registrar or DNS services, so all the queries related to your domain are routed to Amazon Route 53 name servers for resolution.
If we purchase a domain from Route 53, then the hosted zone is created automatically and we don't need to create one.
Sign in to the AWS management console
Go to the Amazon Route 53 dashboard from the Services menu or visit https://console.aws.amazon.com/route53/
On the left sidebar, spot the Hosted zone
As of now, there is no Hosted zone available
Click on Create Hosted Zone:
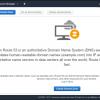
(Click on image for larger view)
In the Create Hosted Zone, provide Domain Name, Comments, and Type.
Click on Create. As mentioned earlier, four name servers are associated with the public hosted zone:
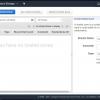
(Click on image for larger view)
Select a public hosted zone and verify the details, including the TTL in seconds and the name server values:
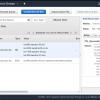
(Click on image for larger view)
To add and update name servers with a registered domain, follow these steps:
Note all four of the name server values available with the hosted zone. We need to use these name server values in our registered domain.
Click on the Registered domains, and select the domain that you have already purchased.
Click on the Domain name.
Click on Add/Edit Name Servers.
Update the Name Servers.
Click on Update.
Now, the public hosted zone is available.
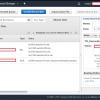
Let's consider a scenario where the application is hosted in an Amazon EC2 instance and we want to route traffic to an Amazon EC2 instance. The following steps demonstrate this process:
Create an Amazon EC2 instance and note down its public IP address.
In the record set, provide www as the name.
Select an IPv4 address in the Type field.
Give the instance's public IP address in the Value field.
Select the Simple Routing policy.
Click on Create:
(Click on image for larger view)
This tutorial is an excerpt from "Practical AWS Networking" by Mitesh Soni and published by Packt. Use the code ORNCA50 at checkout to save 50% on the recommended ebook retail price until Feb. 25.
About the Author
You May Also Like


